Cheap Raised Garden Beds


San Diego may have amazing weather, great tourism, and a laid back vibe, but what it does not have is quality soil. Aside from the river bed in mission valley, the landscape here is primarily decomposed granite or clay. Not exactly the most hospitable, inviting environment to grow healthy vegetable plants. Well, any plants for that matter. What this means is that growing your vegetables in cheap raised garden beds is the most attractive prospect. Not only do cheap raised garden beds allow you to blend a specific amount of soil with a high-quality fertilizer like Native Soil, the basic rectangular beds make optimizing the square footage an easy task. Length multiplied by width.

Whoever said we’d never need geometry after high school?

In most cases building cheap raised garden beds is as easy as a few stakes and a few fence boards, but there are multiple ways to skin a cat. I’ve compiled several different video tutorials here to get you started on your own cheap raised garden beds.

Truly Cheap Raised Garden Beds

The Crafty Gemini is a woman after my own heart. In this tutorial, she shows us how to build square garden beds for under $15. When you keep the cost of your bed down, you can afford to spend more time, energy and money on making sure the growing medium, the soil, is extremely nutrient dense. One of the aspects of Native Soil that we really like is that it is extremely water soluble, meaning the nutrients are available to plants right away. With a $15 garden bed and Native Soil you could see your starts producing almost immediately.

High-Quality Raised Garden Beds

My raised garden beds were test beds; never meant to look this nice.  Take the time to build relatively cheap garden beds that will stand up to the harsh weather. These beds are using higher quality lumber which means they should last several seasons at the very least.

Neighbor Friendly Garden Beds

My neighbors take extreme pride in their front yards. So much pride that they are quick to tell me when I’m creating an eye sore in my own front yard. When we’re trying to maximize our square footage available for food, I like to include the front yard. Unfortunately, my neighbors don’t always appreciate the DIY ethic I embody. Every cheap raised garden bed project is not appropriate for every yard. Not even ones with high quality treated lumber. This stone border garden achieves the desired square footage for vegetable growing and is easy on the eyes.

Get Out There and Grow

Once you find the right project for your space, get out there and grow. Send us pictures of your progress. The urban gardening movement is extremely exciting. Get out there and plant something.

Join our Email List to learn more about backyard urban vegetable gardening.

[rainmaker_form id=”802″]
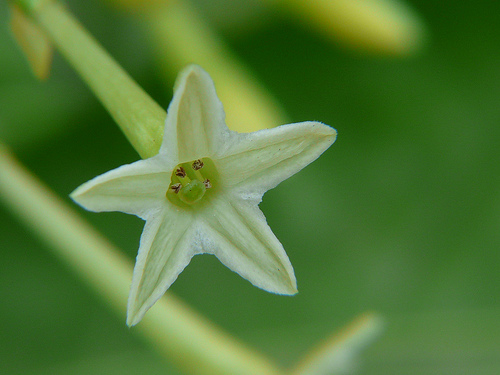
Easy Seasonal Gardening Tips for Beginner Gardeners

Gardening isn’t just fun; it also has many practical benefits. Whether veggies or flowers are your passion, the very act of creating a garden is immensely rewarding. Adding seasonal gardening to the mix will keep give you a reason to keep in your mind in harmony with the seasonal changes. It can even help with conditions like seasonal affect disorder (SAD). The information below provides a little advice and a few pointers when it comes to both your garden, and the act of growing.

Attune to Seasonal Gardening

Your plants will respond better to gradual changes of environment. Not that we have a tremendous amount of seasonal change in San Diego, but there are certainly some nuances to follow. Put the plants outside in the sun for one to two hours in the beginning. Throughout the week, you should leave your plants out for a little longer each day. By the weekend, the plants can make that big move without a problem!Healthy soil gives the seasonal seasonal gardening a leg up

Starting seedlings in pots before planting in your garden is a smart idea. This increases the chance that your plants will survive to adulthood. This method also gives you the freedom of tightening time periods between each planting. After you remove the mature plants from your garden, you can immediately replace them with the seedlings and start the cycle over again.

Start with the Basics

The first thing you can do to avoid pests is to start with healthy soil in your garden. Healthier plants are greater in strength and resistance to illness and insects. For the most vigorous and healthy plants, start with high-quality soil, and stay away from chemicals. These can accumulate salts over time. A product like Native Soil helps to balance out otherwise spent soil. Nutrient rich soil makes seasonal gardening easier in that it improves your chances of successful growth immensely.

Use biennials and annuals to beautify your flower beds. By utilizing quick-growing biennials and annuals, not only will you be brightening up your flower bed, you can also alter its look each season and each year. Use them to fill gaps between shrubs and perennials in the sun. The most popular varieties to use include petunia, zinnia, cosmos, snapdragon, marigold, hollyhock, and sunflower.

Vary Your Seasonal Gardening Plants

night blooming jasmine is a great vine for seasonal gardening
Photo by dinesh_valke

Plant vines like ivy to cover fences and dividing walls. Plants that climb are extraordinarily versatile, and can help hide an unsightly wall or fence, usually within one season. They may grow up through some existing shrubs and trees, and can even be worked to grow around an arbor. Some climbers you plant will have to be tied off and supported, but others have no problem attaching themselves to any surface using their tendrils or twining stems Some of these plants include, wisteria, jasmine, climbing roses, clematis, honeysuckle! I love the smell of night blooming jasmine in the summer time with a nice glass of lemon water on the patio.

To achieve the best growing results, plants need sufficient carbon dioxide. A high level of CO2 provides an optimum environment for growth. A greenhouse can concentrate the levels of CO2. When it is exposed to high carbon dioxide levels, a plant has the best growing condition possible.

Stick with it. Make Seasonal Gardening a Lasting Habit

Whether you have been gardening for a few days or a few decades, you must never deviate from the instructions on the labeling of all implements and chemicals. If you miss this easy step, you run the risk of harming yourself due to the chemicals that can irritate your skin. Keep your health intact and follow the directions to the letter.

Gardening is a very interesting and rewarding activity. The fruits of your time and labors fail to stop yielding, regardless of the dividends are vibrant color outside your windows or fresh foods on your kitchen table. By assimilating what you learned about gardening into your routine, you can enjoy gardening and all it has to offer.

Easy Vertical Grow Trellis Tips for Your Home Garden


Why Grow Vertically?

Ripening vertically maximizes developing room, increases furnishes, and shortens pest and malady difficulties. In short, you need to create a vertical grow in your home garden, especially if you have limited space. In today’s 2 hour tip, I’ll picture you how we moved these heavy function trellises that can support the load of undetermined tomatoes, squash, pumpkins, and even watermelons. These easy-to-make trellises follow a very simple pattern. Concrete remesh, made from welded sword cable, supports a strong grid with big openings for easy better access to fruit. The remesh is attached to an EMT conduit frame expending zip ties.

Constructing Your Vertical Grow

Now let’s move on to the construct. If you’re unfamiliar with any of information materials expended, don’t worry, I’ve supplied associates in the specific characteristics for enquiries on every piece. You’ll necessitate two 8 foot parts of 1/2″ EMT conduit for the verticals and a 41 1/2″ fragment for the horizontal. To connect the verticals to the horizontal, you’ll necessitate two 1/2″ EMT 90 degree drag shoulders. Conduit is sold in 10 hoof parts, so you’ll have to cut the verticals to 8 feet and the horizontal to 41 and one half inches. You can use a pipe cutter or a hacksaw to make the cut. I then connected the verticals to the horizontals expending the 90 degree drag shoulders, and laid the frame down to attach the 84 by 43 inch remesh.

The 41 1/2″ horizontal plus the shoulders render the perfect width for the remesh. Applying black UV-resistant zip ties, I fastened the remesh to the frame, expending 7 zip ties to affix the upper part of the grid to the frame and four on each side. I expended two 3 1/3 hoof parts of rebar to assure the trellis to the garden-variety. To determine where to drive the rebar into the grime, I simply put the trellis in place. When I hoisted it up, the conduit had left 2 indentations. I then expended these indentations as steers as to where to drive the rebar.

Final Steps to Your Vertical Grow

I drove each fragment of rebar about half way into the grime. Some weeds, like peas and beans, will naturally cling to the trellis, but for those that don’t, I’ll weave the weeds through the grid as they thrive. This will be delivered more than enough support for most weeds. But big fruiting weeds like pumpkins and watermelons may need additional assist. In this case, I’ll often use a harness made from an old-fashioned t-shirt, wrap the harness around the fruit, and tie it to the frame. Well, that’s all for now. Thank you very much for watching this 2 hour tip.

Excited about getting started with your own home garden? We are too! Join us to learn more practical advice!

[rainmaker_form id=”530″]

As found on Youtube

Photo by Sangre-La.com