At Upcycle, we’ve been ecstatic with the #UrbanGardening movement. The idea that you have be in possession of large swaths of land in order to grow your own food is as antiquated as harvesting by hand. The biggest issue most people run into when trying to do a little urban gardening is that the soil, simply from being in an urban environment with all the pollution that entails, is such poor quality. Run off from storms, commercial flights and dense urban traffic all conspire to reduce the nutrient density in urban soil. The easiest way to get around this pollution issue is using cheap raised garden beds.
By getting the garden beds up and into their own defined space, a soil amendment like Native Soil can do wonders to heal the polluted urban soil. We’ve looked at cheap raised garden beds beforeon this blog, but I wanted to spend some time looking at how to build them for under $20.
Inexpensive Raised Bed Garden
Nothing like a little garden project to make any mother-in-law happy. This cheap raised garden bed contains roughly one cubic yard of space that can be used with potting soil or any soil that’s combined with Native Soil fertilizer.
$2.00 Raised Garden Bed?
Depending on how much you want to upcycle and reuse, a cheap raised garden bed can be had for the paltry sum of $2.00. Now, it may not look as nice as brand new treated lumber, but it will get the job done. If you’re working on a true urban guerilla grow, this may be the approach you want to take.
By using such a cheap garden bed you can live to fight another day if the garden is removed from the poached land.
Cheap Raised Garden Beds – Platic Crates
Here’s a project I absolutely love. This raised garden bed uses recycled plastic crates in lieu of lumber. By using crates, this project all but eliminates the need for tools. Depending on where you find these crates, this may be the cheapest project yet. Including the $2.00 guerilla grow.
Cinder Block Cheap Raised Garden Bed
If you can’t find crates, you can almost certainly find cinder blocks in an urban environment. The best thing about this project, aside from the cost, is that it will last. Cheap wooden raised garden beds have a tendency of being beat into submission by the elements. Not so with cinder blocks. Plenty of these beds are still around for years and years after they were first built.
Don’t get hung up on the materials you use when building your beds. Something can always be repurposed for the right job and the right environment.
San Diego may have amazing weather, great tourism, and a laid back vibe, but what it does not have is quality soil. Aside from the river bed in mission valley, the landscape here is primarily decomposed granite or clay. Not exactly the most hospitable, inviting environment to grow healthy vegetable plants. Well, any plants for that matter. What this means is that growing your vegetables in cheap raised garden beds is the most attractive prospect. Not only do cheap raised garden beds allow you to blend a specific amount of soil with a high-quality fertilizer like Native Soil, the basic rectangular beds make optimizing the square footage an easy task. Length multiplied by width.
Whoever said we’d never need geometry after high school?
In most cases building cheap raised garden beds is as easy as a few stakes and a few fence boards, but there are multiple ways to skin a cat. I’ve compiled several different video tutorials here to get you started on your own cheap raised garden beds.
Truly Cheap Raised Garden Beds
The Crafty Gemini is a woman after my own heart. In this tutorial, she shows us how to build square garden beds for under $15. When you keep the cost of your bed down, you can afford to spend more time, energy and money on making sure the growing medium, the soil, is extremely nutrient dense. One of the aspects of Native Soil that we really like is that it is extremely water soluble, meaning the nutrients are available to plants right away. With a $15 garden bed and Native Soil you could see your starts producing almost immediately.
High-Quality Raised Garden Beds
My raised garden beds were test beds; never meant to look this nice. Take the time to build relatively cheap garden beds that will stand up to the harsh weather. These beds are using higher quality lumber which means they should last several seasons at the very least.
Neighbor Friendly Garden Beds
My neighbors take extreme pride in their front yards. So much pride that they are quick to tell me when I’m creating an eye sore in my own front yard. When we’re trying to maximize our square footage available for food, I like to include the front yard. Unfortunately, my neighbors don’t always appreciate the DIY ethic I embody. Every cheap raised garden bed project is not appropriate for every yard. Not even ones with high quality treated lumber. This stone border garden achieves the desired square footage for vegetable growing and is easy on the eyes.
Get Out There and Grow
Once you find the right project for your space, get out there and grow. Send us pictures of your progress. The urban gardening movement is extremely exciting. Get out there and plant something.
Join our Email List to learn more about backyard urban vegetable gardening.
I’m not sure if you’ve noticed, but the Sun is going to set slightly earlier and the heat index is climbing steadily here in San Diego. As of the date of this publishing, California isn’t currently in a drought, but that doesn’t mean that conserving water, especially in our garden landscaping isn’t important. Saving water in all contexts is important. Vegetable gardens require a fair amount of water to ensure that the plants grow up healthy and happy. Here are some of our favorite tips for how to protect and water your vegetable garden for summer heat.
This one is kind of a no-brainer but if you can get the water on the ground earlier, it has more time to absorb and takes longer to evaporate. Not to mention the plants can absorb more water if there is more water available. You want nice big juicy vegetables coming off your plants, so set an early alarm or a water timer and set it for early in the morning, preferably before dawn. If you’re using Native Soil, and I hope you are, you can use less water in general as Native Soil features high water soluble nutrient density. This means less water gives the plants more nutrients than comparable fertilizers.
The big leafy plants are usually the first to show signs of dehydration and other forms of distress from the heat. The broad leaves use a lot of water and more moisture is sucked out of the larger surface area. Keep a close eye on your squashes, your lettuces, and your cucumbers to find the plants that are really feeling the stress. Water your vegetable garden for summer heat the minute you see those big leaves start to wilt. That will help you dial in the proper schedule and time of day to deploy your watering.
Water Your Vegetable Garden for Summer Heat Less Frequently
This point is more about conservation so you’ll have to play around a bit to find the most useful frequency to water your vegetable garden in the heat. In most parts of San Diego, even in the summer, a heat wave doesn’t last too long and the coastal microclimates are still pretty mild. In this case, watering twice a week may be sufficient if you’re watering at the right time of day. On the other hand, if you’re in the inland valley areas of the east county, the summer heat can be both consistent and brutal. Even if you have all of your other tips and tricks employed, you may find yourself needing to water four times during the week.
Use Raised Garden Beds
Using raised garden beds aren’t just for areas with limited space and one of the great balcony garden ideas. They are also easier to saturate with water as the volume is finite. You’re not going to find random grasses, weeds, and trees leeching that precious water from your heat stressed garden. Here’s a pro-tip, combine the use of hay bails with a cheap raised garden bed. Straw is extremely water absorbent. In fact, farmers have to worry about their hay bail stacks getting wet as the chemical reaction is sufficient to heat the hay to the point of combustion. You’re not going to have it packed in that tightly, but we highly recommend growing in straw. Check out our article on building cheap raised garden beds to restructure your garden to be as resistant as possible.
At Upcycle we hope you’re able to find the right way to water your vegetable garden for summer heat. It’s a bit of a tricky learning curve, so err on too much water to start and keep an eye on those big leafy plants. There’s nothing like a backyard barbecue featuring your own home grown produce. Find your soil mate.
One aspect of living and working in San Diego is the ability to grow basically anything year round. We don’t really have “garden seasons” like the pour souls in other parts of the country. Our Mediterranean climate means not having to worry about little worries like frost, snow, tundra… you get the point. Even so, if you want a great garden, you need to be a master garden planner.
Just because you can grow anything at anytime doesn’t automatically mean that you should. Planning a garden is half the battle, so knowing what you want to grow and when can be a somewhat daunting task.
Garden Planner to the Rescue
We came across a great app to help out in that arena. It’s called Garden Time Planner and it will walk you through the process of growing whatever you want and give you a pretty accurate estimate of when what you’re growing will be mature.
It is region specific, so even if you’re not in California and are blessed by a mild climate, you can really dial your garden in. Terrible weather is not an excuse not to grow.
The app is made by the Burpee company, so you know it is going to be made specifically for gardeners. Burpee has had gardeners backs from all the way back in the late 19th century. They’re synonymous with home gardens.
As you can see, the app is easy to use and really provides the specific data to ensure that your grow is going to be a hit. Aren’t smartphones wonderful?
Alternatives to Garden Planner
If smart phones and apps aren’t your style there’s nothing wrong with going analog. A simple day planner will allow you to chart your garden progress and growing timelines. There are several day planners and journals that will help you to track your growing season.
I particularly like the vegetable gardeners handbook. Its light and simple, straight forward and to the point with tons of practical advice.
We’ve been pretty adamant at Upcycle and Company that just about anyone can be a gardener. One of the most common objections we hear from people who would love to grow their own food, but they’re convinced they don’t have space. No outside yard means no growth in their minds. Well, they couldn’t be further from the truth. How about a hay bale garden? We posted a link on Facebook this last week that shows how anything can be grown at home in hay bales.
Gardens can be planted anywhere. Even on concrete balconies or driveways.
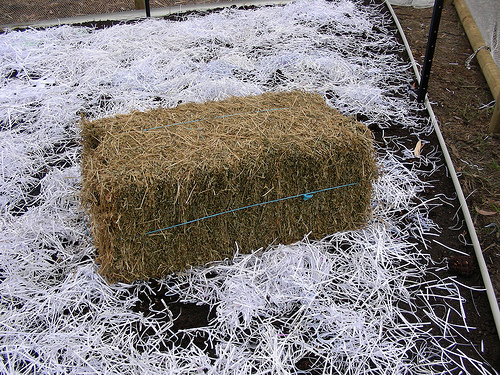
The idea behind straw bale gardening is simple. Plants grow in the top of the straw, which begins decomposing as soon as it gets wet. As the straw breaks down, it turns into a rich, compostable planter that’s ideal for growing vegetables.
The advantage of straw bale gardening is that you can set the bales anywhere where it’s sunny, as long as you can keep it watered. poor soil? it doesn’t matter. you can even set the straw bales on a concrete driveway.
the first step – get a bale of straw. you can find them at most garden centers and feed stores for under ten-dollars.
Sounds like a pretty good deal. At Upcycle, we created #NativeSoil to help those without appropriate growing conditions to get out there and do some practical growing.
Prep Your Hay Bale Garden
Prepping the hay bale is a two-week process, so make sure you plan ahead. Step 1, thoroughly wet down the hay bale. From gardeners.com:
The first week
Water the bale thoroughly, until water runs out the bottom of the bale. Sprinkle the surface with a nitrogen source (see box), applying at the recommended rate.
Every other day, add more of the nitrogen source; water thoroughly. Do it a total of three times during the first week.
On the days you don’t apply nitrogen, just water the bales thoroughly.
The second week
For the next three days, apply the nitrogen source daily at half the original rate. Follow up with thorough watering.
After three days of adding nitrogen, water daily.
The last step is to add a well balanced all around fertilizer like #NativeSoil. Since Native Soil is a slow release powdered fertilizer, the nutrients are available immediately and released slowly over the growing season. This allows you to have a one and done fertilizing philosophy. Once the hay bales begin to decay from the inside, they will begin to heat up. In roughly a week, you’re looking for an internal temperature of 75 – 80F.
At that time, the bed is primed and ready to receive your vegetable starts.
Don’t ever let anyone tell you that your concrete slab isn’t a great place to grow some tasty vegetables. When you’re growing in small spaces, you have to sometimes think outside the box.
The best part though? No weeds and you don’t even have to get your hands dirty.
Watch KTVB’s coverage of this hay bale garden phenomenon.
As Americans, we have developed a bad habit of not really watching what goes into our bodies as fuel. We tend to eschew this part of our daily routines. So busy that we run out of the house without eating breakfast, subsisting on coffee and donuts until the mid afternoon when we break for a lunch that ends up being pure junk. Because junk is quick. At Upcycle, we prefer to take life a little slower and make sure that we keep an eye on our superfood consumption.
Superfood Consumption Benefits
What’s more is that you can grow so many different superfoods right in your own home. You don’t have to go to the local health food store to get some fancy macrobiotic, genetically engineered frankenfood. No way. You can pull your superfoods for consumption right out of your own plants. And it’s a double whammy. While you’re saving money growing your own superfoods for consumption, the basic act of nurturing a plant from seedling to mature, produce producing, plant is mentally satisfying in its own right. Wait… that’s a triple whammy.
Recent dietary research has uncovered 14 different nutrient-dense foods that time and again promote good overall health. Coined “superfoods,” they tend to have fewer calories, higher levels of vitamins and minerals, and many disease-fighting antioxidants.
What Should I Grow?
Beans (legumes), berries (especially blueberries), broccoli, green tea, nuts (especially walnuts), oranges, pumpkin, salmon. soy, spinach, tomatoes, turkey, whole grains and oats, and yogurt can all help stop and even reverse diseases such as hypertension, diabetes, Alzheimer’s, and some forms of cancer. And where one might have an effect on a certain part of the body, it can also affect the health of other body functions and performance, since the whole body is connected. With these 14 foods as the base of a balanced, solid diet, weight loss gimmicks and other fly-by-night programs can become a thing of the past in your life.
Why Should I Be Consuming Superfoods?
Conversely, the ill-effects of an unbalanced diet are several and varied. An unhealthy diet causes low energy levels, mood swings, and exhaustion. Add weight change, body image issues and you’ll know your diet is unbalanced. An unbalanced diet can cause problems with maintenance of body tissues, growth and development, brain and nervous system function, as well as problems with bone and muscle systems.
Symptoms of malnutrition include lack of energy, irritability, a weakened immune system leading to frequent colds or allergies, and mineral depletion that can trigger a variety of health concerns including anemia.
And since the body is connected, realizing that an unhealthy body will result in an unhealthy spirit only makes sense. When we nourish our body with these superfoods and complement them with other nutrient-dense and healthy fresh foods, our spirit will be vitalized and healthy as a direct result.
Start Today
Don’t wait. Every day you wait is a day you’re living with your poor diet.
Many modern diets based on prepackaged convenience foods are sorely lacking in many vitamins and minerals. That vitamin deficient diet will affect our mental capacities as well. It will cause anxiety, confusion, and the feeling of ‘being in a fog’ all the time. If you’ve ever spent a day at the office where you have the mental prowess of a block of ill-treated wood, you know what brain fog is all about.
As a result it is so easy and rewarding to grow your own superfood from scratch. Native Soil serves as a perfect amendment to any home garden. Urban areas, tend to have nutrient deficient soil. It is as if the soil absorbs the personality of the humans scurrying around it. Just a little bit of Native Soil to restore the soil health is a no-brainer.
Conclusion
Superfoods can be the basis of a sound, healthy, nutritious solution to curing many of these ailments and more. Don’t let another foggy day slip by. Seize the day. Get your hands dirty.
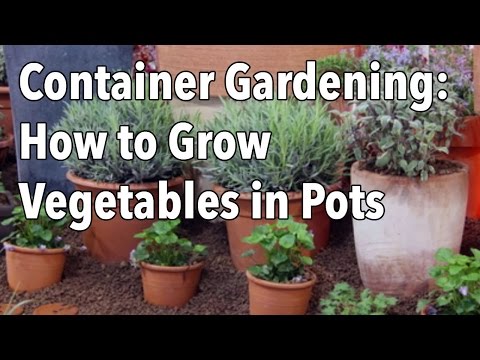
If you don’t know the joy of growing your own food because you’re short on space, don’t be alarmed. At Upcycle we think everyone should be growing their own food and that it can be done in the smallest of places. Now, you may have tried your hand at putting a few potted balcony plants out on your terrace in your apartment. Chances are that you may have a ficus tree, or a small palm or probably some flowers. I bet you didn’t know that vegetables actually make great balcony plants. They’re just as easy to grow in pots as they are in a sprawling backyard garden. The video below gives some great tips on getting started with container gardening. Welcome to the world of vegetables as balcony plants.
The best thing about growing balcony plants in containers is that you’re not limited to what you can grow based on your location. Use Native Soil to tailor your soil to your specific crops.
Think Outside the Backyard
Container gardening is becoming more and more popular as people appreciate the flexibility and extra growing space it provides. It’s not just about flowers either – you can grow your own tasty produce right outside your door and many specially-adapted plant varieties are now available. But growing in containers does come with its own special challenges and if you want to succeed it’s important to plan ahead. Let us take you through the essentials. Where to site your containers is the first thing you need to consider.
Most vegetable plants like lots of sun, so it’s important to choose a place which will provide 6 hours or more of direct light – south or west facing locations are the best. Placing them as close to your house as you can will mean you have easy access to your plants – great for harvesting and easy for you to take care of them. Choose a sheltered spot for your pots so your plants are kept out of cold, drying winds. Walls, fences & hedges are good locations, or try to screen the pots.
Using your window ledges and balconies is a great way to get started if you don’t have a garden but make sure your pots are properly secured to prevent them from blowing off when the weather gets windy. Watering is the number one priority for containers as the plants won’t have access to moisture below ground. On a hot sunny day they can dry out within hours and plants might not recover from serious wilting. On hot days giving plants a thorough watering in the early morning and evening will be required, making sure that you don’t just wet the surface, but allow it to soak down to the roots. For added convenience, drip irrigation can be installed – particularly useful if you’ll be away from home during part of the summer.
Planning Ahead is Key
Containers come in all shapes, sizes colors and materials. Plastic and wood are tried and tested materials, but you can unleash your creativity. Just make sure they are clean and won’t leach harmful chemicals. Large pots can also be used to grow plants that aren’t native to your area. For example they can be filled with special soil for blueberries, which like acidic conditions. And for heat loving plants such as dwarf citrus trees, containers enable the plans to be moved to a warm conservatory or greenhouse during winter months, protecting them from the worst of the winter weather.
There are plenty of options available for using vertical space too, and if you have a warm sunny wall which absorbs heat during the day this will radiate the warmth during the night, protecting the plants from cold snaps. It’s essential to provide good drainage. Plants are easily killed if their roots are waterlogged. Make sure there are adequate drainage holes and that they’re free from dirt or blockages Adding a shallow layer of stones or broken pottery to the base of the pot often helps to improve drainage.
The aim is to cover the drainage hole so the soil doesn’t leak out while still providing gaps for excess water to drain through. Fill the container with a purchased potting soil or your own homemade compost. Don’t use soil from your garden, as this is likely to be heavy and to contain weeds and soil-borne pests. Using a lightweight and moisture-retentive mix is the best for containers, and it will need topping up each season to replenish nutrients which have been used up.
Choose the Right Container for Your Balcony Plants
Which container is best to use will depend on what sort of crops you are growing, so let’s take a look at some of the best veggies to grow in containers. It doesn’t get any easier than growing salad leaves. They only need a shallow container a few inches deep. If summers are hot in your location, choose an area that gets morning sunshine and afternoon shade to avoid the plants bolting (running to seed) before they’re ready for harvest. Cut-and-come-again type salad leaves often come in packets with several different varieties, providing an exciting mix of leaves that will only take weeks to grow.
Tomatoes can be grown in several different types of containers, but they’ll need plenty of soil to supply the nutrients they need right up to harvest. Many varieties, such as Tumbling Tom, can be grown in hanging baskets, and look great as they trail towards the floor. Other varieties can be grown in grow bags or soil bags, or you can use large pots at least 10 inches in diameter. Make sure you use a stake and tie the plants to it to keep them upright. Tomatoes are very thirsty so will need lots of water – at least twice a day in hot weather.
Potatoes can be grown in large pots, or bags and sacks designed specifically for the job. The seed potatoes are layered with potting mix and left in a sunny spot, watering as required. As they grow you can layer more soil around the stem of the shoots. Gradually the soil builds up until the top of the container is reached. Balcony plants can be vegetables, herbs, and edible flowers. Take a look at our extensive Grow Guides for more information. Our Garden Planner has a range of specially designed garden objects to make planning and managing your container gardening easy. With the basic outline of your space, you can then view garden as a whole.
Mix and Match to Suit your Tastes and Your Crops
As you add the different containers that you’ll use to your plan make sure you leave enough space so you can water and harvest your balcony plants. The Parts List will provide a useful summary of all the containers and other objects, such as drip irrigation, for the plan. Adding plants is as simple as clicking to place them in the relevant containers with the colored area around each plant indicating how much soil space the roots require.
For example, we can easily see how many tomatoes will fit into this grow bag and hanging baskets. Add potatoes into the potato sacks, and choose which salad leaves to include in the grow frame. The Plant List then shows you a complete summary of what you were growing including when to plant seeds indoors and outdoors, and when you can expect the harvest, specific to your location. Twice a month you’ll also receive email reminders so you know what jobs need doing and when. Gardening in containers is an easy way of growing your own and you can expand with more containers to fill the space you have.
Whether you have one simple pot for herbs, or a mini farm full of plants, its easy to get hooked on the taste of growing your own fresh produce and the convenience of having it right outside your back door.
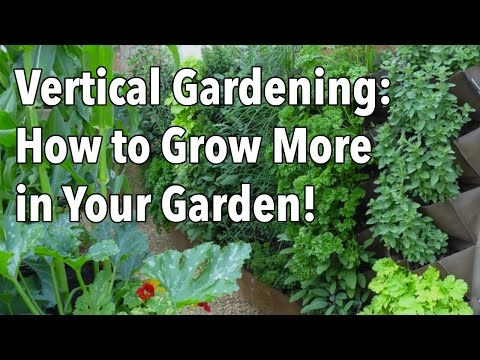
Grow a Ton of Food in a Tiny Space with a Balcony Garden
At Upcycle we really enjoy growing food with Native Soil. One of the concerns we hear most often is that many people don’t have enough space for a big home garden. It is a problem especially among the young, or those living in cities where tiny apartments and condos are the norm. That’s where the concept of balcony gardens, or vertical gardening comes in handy. With a balcony garden anyone can take a tiny amount of space and create huge amounts of food.
All it takes is a little planning to know what to build, what to buy and what plants to grow to make the most out of your balcony garden. The video below does a great job illustrating some easy tips to grow more in a balcony garden.
When space is at a premium and you’ve got nowhere left to grow there’s only one solution – reach for the skies! Given the combination of the right crops, vertical supports, and wall-hugging planters you can pack a lot more into the space you have available. In this video we look at how to plan a vertical vegetable garden so you can get the most from your plot. Climbing plants offer a logical way to begin growing skywards. Suitable vegetables include pole (or climbing) beans, climbing peas, sweet potatoes, vining tomatoes plus sprawling types of zucchini, cucumber, melon and squash that can be trained up supports. Allow plants to find their own way up supports or tie them in at intervals to encourage them upwards.
Many structures can offer support for skyward plants. From simple rows of bamboo canes to more complex or decorative structures. Arbors and arches look complete with climbers such as passionfruit or a grapevine, or how about climbing squashes or beans with colored pods or fruits. The pods or fruits will then dangle down to create a feature that’s both delicious and attractive.
Upcycle Old Furniture to Create Growing Lanes
Wicker or bamboo wigwams offer a space-saving and arguably more attractive alternative to the usual rows of canes, while obelisks and pergolas present decorative solutions to growing upwards. Our Garden Planner features many support options that can be selected and dropped into your garden plan. Many tree fruits can be trained into a vertical plane, either against a wall or fence, or along freestanding wire supports. Apples, pears and cherries are just a few examples.
These trees may be trained to produce single-stem cordons, fan shapes, parallel-branched espaliers, or other fence-hugging forms. Use sturdy horizontal wires strained between fence posts to create the necessary supports for wall-trained fruit. Cane fruits, such as raspberries and blackberries, naturally grow tall. Left unsupported, the canes have a habit of flopping over to smother neighboring crops. Parallel wires secured between upright posts will keep them in line. Our Garden Planner has a range of space-efficient plants to choose from – for example, this apple cordon. The Planner also helps you to select and place supporting structures. Take these pole beans for example – they need some bamboo canes to climb up.
Make you garden work harder for you by including any number of wall-mounted or stepped planters, planting pockets, tower planters and hanging baskets. Fill them with herbs, salads and strawberries, then watch a blank space take on a whole new life. The Garden Planner has lots of ideas for suitable containers. Simply click the Information button for a description of each and its suitability for your garden. Recycled food tins make great wall mounted planters.
Old pallets are widely available, and turning them into vertical planters is a great way to reuse them. Check they are safe for re-use by looking for the pallet stamp. It will have stamps displaying the IPPC logo and/or the letters EPAL, plus HT or DB. Hammer or hang your recycled containers into position before filling with potting soil.
Don’t Forget to Water, or Better, Automate!
Wall-mounted planters are likely to require regular watering because of the rain shadow cast by the wall. Micro or drip irrigation systems deliver water efficiently. Automate water delivery by coupling irrigation with a cheap timer. Walls or fences must be strong enough to hold the considerable weight of damp potting soil. In most climates you will also want to make the most of sunshine but picking a surface that faces the mid-day or afternoon sun. Reflected heat from the day speeds growth time and shortens harvest time. It’s the right combination of vertical- growing crops, supports, and the correct containers that will help you to get the most from a small space.
Of course, there are plenty of other ideas out there for vertical vegetable gardens. If you’ve got one, don’t keep it to yourself – share it by dropping us a comment below. And with seed sowing beginning in earnest, now is the ideal time to subscribe to enjoy more great gardening videos.


 Beans (legumes), berries (especially blueberries), broccoli, green tea, nuts (especially walnuts), oranges, pumpkin, salmon. soy, spinach, tomatoes, turkey, whole grains and oats, and yogurt can all help stop and even reverse diseases such as hypertension, diabetes, Alzheimer’s, and some forms of cancer. And where one might have an effect on a certain part of the body, it can also affect the health of other body functions and performance, since the whole body is connected. With these 14 foods as the base of a balanced, solid diet, weight loss gimmicks and other fly-by-night programs can become a thing of the past in your life.


 Potatoes can be grown in large pots, or bags and sacks designed specifically for the job. The seed potatoes are layered with potting mix and left in a sunny spot, watering as required. As they grow you can layer more soil around the stem of the shoots. Gradually the soil builds up until the top of the container is reached. Balcony plants can be vegetables, herbs, and edible flowers. Take a look at our extensive Grow Guides for more information. Our Garden Planner has a range of specially designed garden objects to make planning and managing your container gardening easy. With the basic outline of your space, you can then view garden as a whole.